 40kn Sail Router
Your first route
From opening the app to a route on the map, in about five minutes.
You need a modern browser and a connection. There is no account, and you don’t have to install anything to route online. If you plan to rely on the app at sea, install it before you download any forecasts.
Find your way around the screen
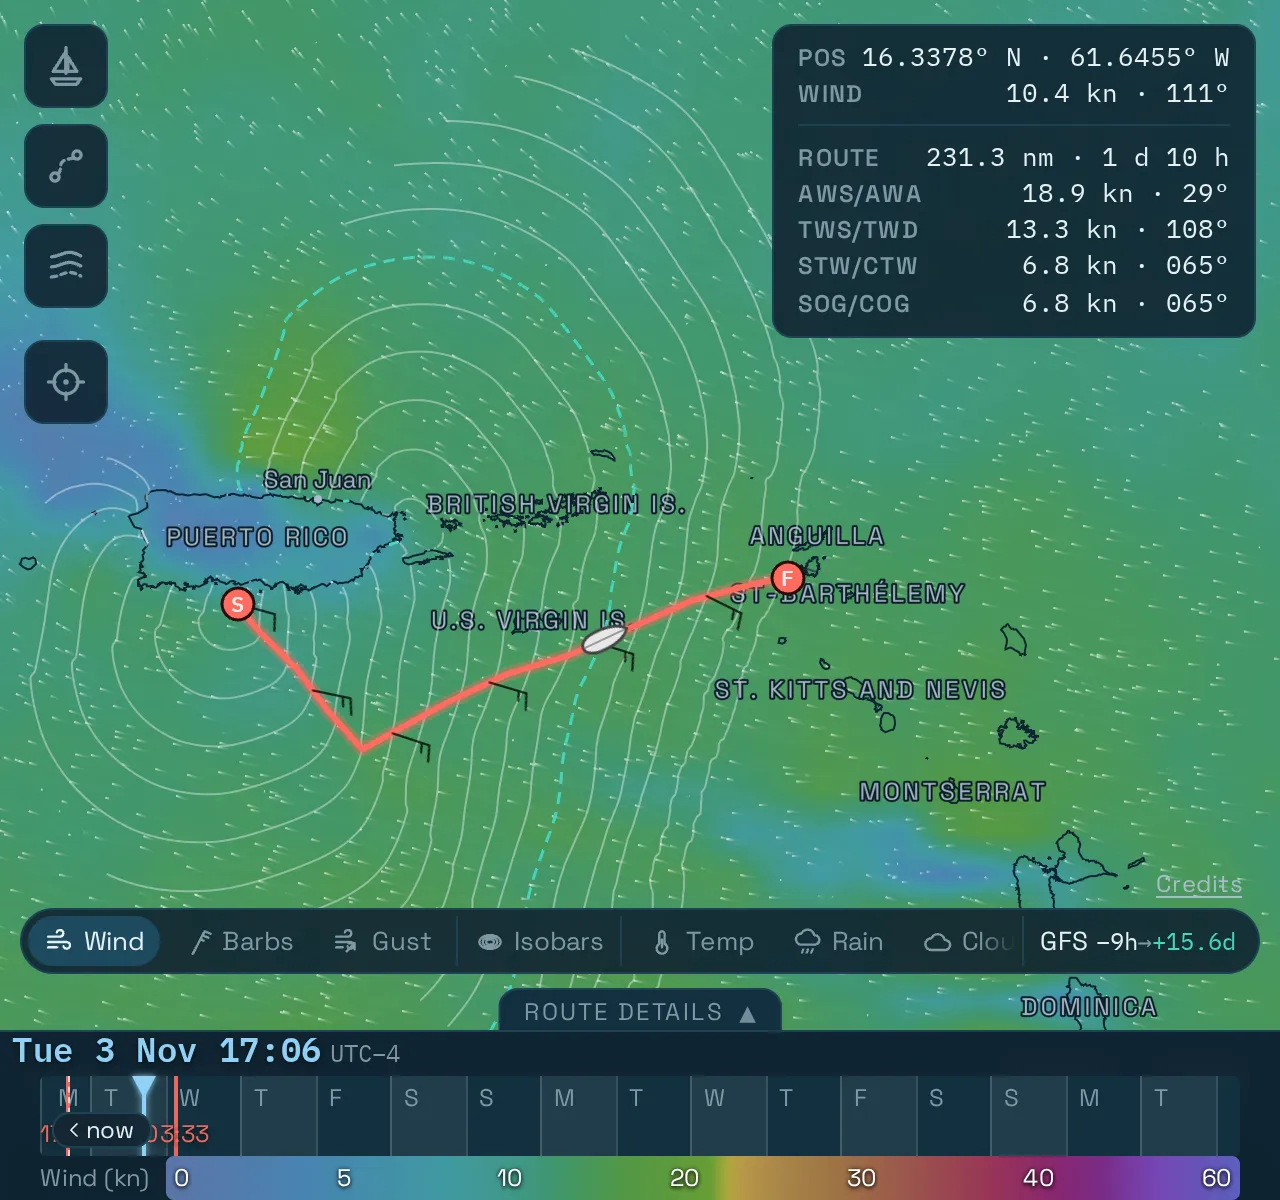
In this example the destination is almost upwind, so the fastest route has to tack.
- Top left: the buttons for Boat setup, Routing setup and Routes, and below them one that centres the map on your position.
- Top right: the readout, with the position and the forecast at your cursor. Once there is a route, it also shows the boat’s numbers.
- Bottom right: the layer bar, with Wind, Gust, Waves and so on. Its last segment names the active forecast. Tap that to switch forecast.
- Bottom: the time axis. Drag it to move the whole map through the forecast.
The first time you open the app, it shows a safety notice. Please read it, because it says what the app can and can’t do. You can find it again later under Credits, at the bottom right of the map.
1. Set the start and destination
- With a mouse: click the map where you start and pick Start point. Click again and pick Destination.
- On a touch screen: pan the map until the crosshair is on the spot, tap the crosshair, and pick the role.
You can also type a position as lat, lon in the From and To fields in Routing setup, for example 17.85, -66.6.
Both points must be on water. Place them in open water just outside the harbour, because the app’s coastline is simplified.
2. Choose your boat
Open Boat setup. A new device starts with one boat from the ORC list so you can try the app straight away, but a route is only as good as its polar. Pick yours:
- ORC polars searches almost 100 boats by type or manufacturer.
- Add your own takes a polar file or pasted text.
Your boat explains the polar and how to make its speeds realistic.
3. Check the forecast
The layer bar’s last segment shows the forecast the map is using, such as GFS −7h → +15.7d. That forecast started 7 hours ago and reaches 15.7 days ahead. Tap it to see the forecasts that cover the map view.
Routing uses the same forecast unless you pick another in the Forecast row of Routing setup. A forecast that can’t cover your start and destination isn’t offered there.
The forecast models describes each one and shows when it last updated.
4. Run the router
Open Routing setup.
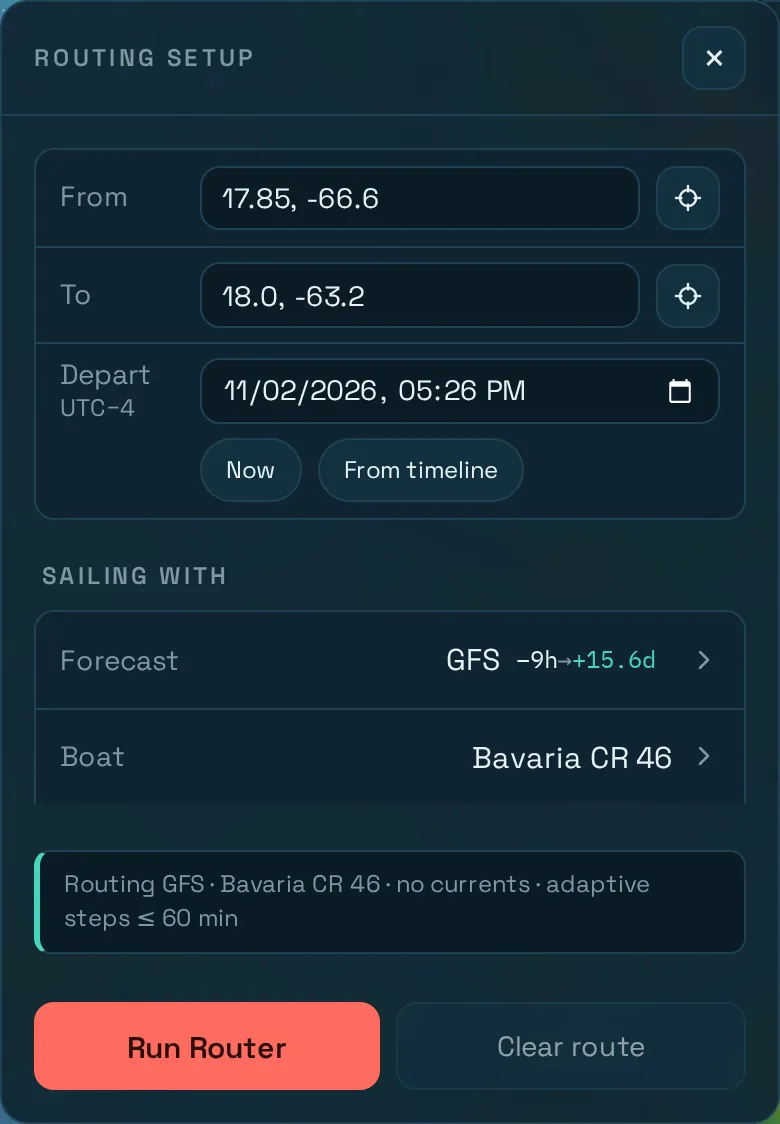
- Set Depart. It uses your device’s local time, and the zone is shown under the name. Now fills in the current time, and From timeline fills in the time shown on the axis.
- Read the line above the button. It says what pressing Run will route, for example
Routing GFS · Bavaria CR 46 · no currents · adaptive steps ≤ 60 min. If something is missing, it says what and where to fix it. - Press Run Router.
The line then shows the result, for example Done — 101 waypoints, 231.3 nm, 2 tacks, 0 jibes. If the destination was not reached or the run failed, the line says why.
5. Look at the result
The route appears on the map. Drag the time axis to watch the boat sail it through the changing weather, and open Route details at the bottom for graphs, the full report and GPX export. Reading the result explains them all.
This first route is only a starting point. It’s the fastest way through one forecast with one set of assumptions, and it doesn’t know about sea state, depths or shipping. Planning a passage shows how to use it to understand the weather and your options.